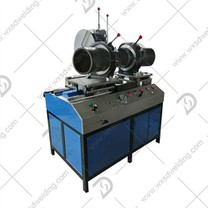
I. Pre-Operation Preparation
1. Equipment Inspection
Check the hydraulic system oil level (the oil level should be 2/3 of the way up the tank) to ensure there are no leaks.
Test the heating plate function, clean the surface, and verify temperature control accuracy (for example, the heating temperature for PE pipes should be 220 ± 10°C).
Check that the milling cutter, fixture, and other mechanical components are functioning properly, ensuring the pipe misalignment rate is ≤ 10% of the wall thickness.
2. Parameter Settings
Set the welding pressure, heating time (usually wall thickness x 10-13 seconds), and hold time according to the pipe specifications.
II. Operation Steps
1. Pipe Fixing and End Preparation
Secure the pipe in the fixture. Use a milling cutter to flatten the end face and remove the oxide layer.
Check the pipe alignment and ensure the misalignment rate meets the requirements.
2. Heating and Welding
Place the pipe on the heating plate and apply pressure to close the pipe ends together, forming a uniform flange. After heating is complete, quickly remove the heating plate and push the clamps to butt the pipes together to form a uniform flange.
3. Cooling and Inspection
After natural cooling, inspect the weld point. The flange should be smooth and free of bubbles.
3. Precautions
Wear protective equipment during operation and avoid contact with hot components.
Regularly replace the hydraulic oil (every 500 hours) and clean the heating plate.
4. Further Reading
Select the appropriate welding machine type for each pipe diameter (e.g., a butt fusion welder is required for pipes over 110 mm).
For hydraulic system maintenance, refer to the hydraulic inspection method for nut presses.